Getting started with customizing WiX bootstrapper UI

I wrote this as a guide for people like me who are floundering trying to distill the myriad bits of documentation, forum posts, and blog posts down to the essential bits of "How do I display some different text in my WiX bootstrapper application?"

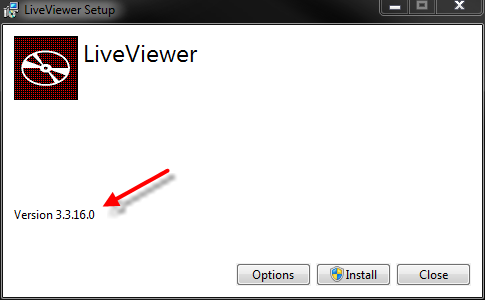
In particular, I'm going to talk about displaying version info on the first page of the bootstrapper UI, something like this:

custom bootstrapper UI with version info

Here are the caveats: This worked for me using WiX 3.8; I don't know whether this will apply to other versions. Also, I'm currently doing an English-language-only installer; I suspect that what I'm doing is compatible with multi-language installers, but I've not tested it in that situation. Also, there may be better, easier, more WiX appropriate ways to do this. Like I said, the documentation and other information on the web is confusing at best. So this is what I put together. It's a bit of a kludge - I took the "Display an RTF EULA and an 'Accept' checkbox" default UI and modified it to my purposes. I'm actually not using most parts of the UI, but I've left them in so I can turn them on in the future (I'm likely to need that EULA ability eventually).

In order to get a custom string on the screen, you're going to need to customize two different parts of the interface. The first is the XML theme for the bootstrapper. This file defines most of the UI (the window, the pages in the installer, the fonts, etc.). Rather than write my own UI from scratch, I cloned the WiX source code from git@github.com:wixtoolset/wix3.git and dug down to one of their default UI definition files: src\ext\BalExtension\wixstdba\Resources\RtfTheme.xml. This is the default definition for a UI which displays a rich-text-format EULA on the first page.

I took RtfTheme.xml, renamed it thm.xml, and dropped it into my project next to Bundle.wxs. In order to display the version number on the main installer page, I modify the <Page Name="Install"> element by adding a simple text field:

    <Text X="11" Y="-73" Width="246" Height="17" FontId="3">#(loc.InstallVersion)</Text>

This new element is pretty self-explanatory - some positioning and sizing information, and a reference to a string which is defined elsewhere (in a .wxl file which we will add in a moment).

The next part was the bit which had me stumped for quite a while. You'll want to add the .wxl file from src\ext\BalExtension\wixstdba\Resources\RtfTheme.wxl to your project. Based on some docs and forum posts, I spent a while trying to get this to work with the .wxl file in the same folder as the .xml theme file (since this was a single-language installer). After some fiddling, it turned out that I needed to put the .wxl (which I creatively named thm.wxl) into a language-specific folder. So in my bootstrapper project I created a folder called 1033 (English-US) next to Bundle.wxs and added the thm.wxl file to it. In the end, the files in the BootStrapper project look like this:

    /1033
        /thm.wxl
    /Bundle.wxs
    /thm.xml

The .wxl file contains all of the strings used in the bootstrapper UI; if you're looking to change window captions, buttons captions, labels, or anything else this is what you're looking for. By default the InstallVersion string is bound to the bundle version, which will also be the version of your application if you've set things up like I did in the article about coordinating app and installer versions.

Finally, I modified Bundle.wxs to use my customized theme:


<Wix xmlns="http://schemas.microsoft.com/wix/2006/wi"
     xmlns:netfx="http://schemas.microsoft.com/wix/NetFxExtension"
     xmlns:bal="http://schemas.microsoft.com/wix/BalExtension">

...

    <BootstrapperApplicationRef Id="WixStandardBootstrapperApplication.HyperlinkLicense">
      <bal:WixStandardBootstrapperApplication LicenseUrl="" ThemeFile="thm.xml"/>
      <Payload Name="1033\thm.wxl" SourceFile="1033\thm.wxl" />
    </BootstrapperApplicationRef>

...

</Wix>

(Notice the BalExtension namespace we're adding.) With all that in place, I now had a bootstrapper which displayed the version number on the first installation page. I also had everything in place to customize the rest of the bootstrapper UI, should that ever become a requirement, and the pieces in place to add localized strings for other languages if we need, for example, a Spanish-language installer.

Installing the .NET Framework with WiX

Another WiX post! I have a feeling there will be several of these, because it's the source of much ... learning for me lately.

One of the more convenient aspects of the old Visual Studio Installer projects was the ability to easily set a required version of the .NET Framework and have it magically installed along with your application. With other installer tools, that's a bit more difficult, but not by much.

This problem is as old as the .NET Framework, though these days it's less of a hassle; I remember back when the .NET Framework being a 20-meg download was a big deal1. Nowadays most machines already have it installed, but in my case I needed to support .NET Framework 4 Client Profile on a completely vanilla install of Windows 7. Which means I needed my installer to run the .NET installer. This requires building a 'bundle', which in WiX is basically a lightweight executable which calls multiple installers in sequence. The .NET installation scenario is a common case, so there's already some documentation for it. Like most documentation for this sort of thing, it's ... not expansive. So I'll tell you what I did to get this working, in the hopes that it will help someone.

I already had a working working installer project which would build an .msi file for the primary application; that project is named 'Product.Installer'. I created a second project (using the 'Bootstrapper' template the the WiX toolset adds to Visual Studio) called 'Product.Bootstrapper'.2 At that point I've got a new Bootstrapper project with a file called Bundle.wxs.

The next step was to add references to both the 'Product.Installer' project and the actual 'Product' project. Then, since we're looking to check for (and possibly install) the .NET Framework, we need a reference to WixNetFxExtension, which can be found in the WiX toolset's bin folder.

Now we can actually set up the installer chain in Bundle.wxs. It should look something like this:

<Wix ...  xmlns:netfx="http://schemas.microsoft.com/wix/NetFxExtension">    
<Bundle ...>
...

    <Chain>
      <PackageGroupRef Id="NetFx40ClientWeb"/>
      <MsiPackage Id="Product.Setup" SourceFile="..\Product.Setup\bin\$(var.Product.Configuration)\Product.Setup.msi"  />
    </Chain>

</Bundle>
</Wix>

The first part of the chain is running the web setup for the .NET Framework 4 Client Profile. It's actually referencing a package that's defined in the WixNetFxExtension we referenced earlier - that's why we need to reference that namespace in the Wix element. I'm using the web installer instead of a redistributable installer; all the combinations of framework version and web/redist are available as package groups. If the user already has this version of the framework installed, this won't do anything.

WiX provides a mechanism for detecting if a sufficient version of the framework is installed (for example, if the user already has the full 4.0 Framework installed, they don't need to also install the Client Profile to run my application); I've ignored that for the time being because this solution was sufficient and I had other things to focus on. Eventually I'll come back to this and make the installer more elegant.

The second part of the chain is my application installer. The MsiPackage element is pretty straightforward. Note that the default when you're using a bootstrapper to launch the .msi is to suppress any UI in the .msi; you'll see the bootstrapper's UI instead. You can override this, but I wouldn't usually recommend it. By letting the bootstrapper run all the other installs in the background, you get a unified UI for the entire installation process. If you required user interaction in your installer (e.g., customizing the installation folder or accepting a license agreement), you can customize the bootstrapper UI to handle that stuff and pass the results on to your .msi.


  1. We can't bust heads like we used to, but we have our ways. One trick is to tell 'em stories that don't go anywhere - like the time I caught the ferry over to Shelbyville. I needed a new heel for my shoe, so, I decided to go to Morganville, which is what they called Shelbyville in those days. So I tied an onion to my belt, which was the style at the time. Now, to take the ferry cost a nickel, and in those days, nickels had pictures of bumblebees on 'em. Give me five bees for a quarter, you'd say. Now where were we? Oh yeah: the important thing was I had an onion on my belt, which was the style at the time. They didn't have white onions because of the war. The only thing you could get was those big yellow ones... 

  2. By this point the solution starts to get cluttered, so I actually put all the installer-related stuff in it's own solution folder. That makes things look a lot cleaner in VS. 

Coordinating application and installer versions with WiX

One of the pains of maintaining an application and an installer for that application is tracking and incrementing the various version numbers. In a situation where you've got a single application and a single installer for that application, you may very well find it easiest for yourself and your users to have the installer and the application itself share the same version number.1

Remembering to set the versions in both the application and the installer is a pain and prone to error, so you're better off just linking them. For a WiX installer using harvesting, that's actually pretty easy to do. Assuming you're harvesting output files using the method I described in my last post, you've got a generated Output.wxs file in your installer project. Pop that open and look for the reference to your executable. It'll look something like this:

<File Id="fil6F19EC81FF06AC93EF5DE0BDA388F7EB" KeyPath="yes" Source="$(var.Product.TargetDir)\Product.exe" />

The important part is the 'Id' - we can use that to reference the file (and its properties) elsewhere in our project. Specifically, in the 'Version' field of the 'Product' element in the primary installer file:

<Product Id="*" Name="Product" 
    Version="!(bind.FileVersion.fil6F19EC81FF06AC93EF5DE0BDA388F7EB)" ...>

We're using a light.exe binder variable to set the version (light is the linker which creates the .msi output). Now the version for the .msi will match whatever the version is set to in the executable; you only need to maintain it in one place.


  1. I used to run into this in corporate environments all the time when creating applications which (for various bureaucratic reasons) weren't officially supported by IT. A user would have a problem, and question number one was "What version do you have installed?". The answer could very wildly depending on whether the user knew to look under "Help -> About", was looking at the "Add and Remove Programs" dialog, or was simply making something up. Keeping the installer and application versions coordinated fixes at least part of that problem. 

Adding project output to a WiX installer project

In the last post I mentioned that I've fully moved to WiX for my installers; in this one I'll cover the first big hurdle I ran into with WiX. Hopefully it will help someone else move along a little faster.

Just a heads up - I'm doing all this in Visual Studio 2013 with WiX 3.8. With other versions of these tools, YMMV.

The first surprising thing that you'll run into coming from VS Setup Projects is that WiX doesn't grab all of your project output by default. To do that, you have to use WiX's harvester tool, a program called Heat. Heat is a command-line tool which will collect file information and generate the correct WiX XML entries for you. Now, heat actually has a project option which is supposed to get the output of a Visual Studio .csproj build, but sadly in the current version it only gets the main output (e.g., your .exe.), not the dependencies. So it's pretty much useless. Apparently the dependencies will get harvested in version 4, but for now you're stuck with the dir option, which will grab all the files in an directory. If you call this in a pre-build event, you can create a WiX file with the project output and use that list in your installer. Mine looks something like this:

call "%wix%\bin\heat.exe" dir $(SolutionDir)Product\bin\Release -var "var.Product.TargetDir" -ag -srd -dr Product -cg ProductComponents -template fragment -out $(ProjectDir)Output.wxs -v -t $(ProjectDir)Filter.xslt

The %wix% environment variable gets set up by the WiX toolset installer. This is handy on your dev machine, but might be tricky on a CI server. More on that later. Also, make sure you check out the heat.exe documentation for what some of these other flags do; you may want to adjust them depending on your circumstances. In my case, I'm using -dr to create a directory reference called 'Product' - that's the folder where these files will ultimately install. The component group is 'ProductComponents' - the main WiX installer file will reference that.

Once I've got this pre-build event generating the 'Output.wxs' file, I need to add that file (as a link) to my WiX project.

That last part of the command line, the -t $(ProjectDir)Filter.xslt bit - I'm telling heat.exe to run the output XML through an XSLT file after it's generated. The XSLT is responsible for removing all the stuff from the output folder which I don't really want in the installer - the .pdb files, .xml files, etc. Because no one should have to slog through writing their own XSLT anymore, here's my Filter.xslt file in full, to make it easier:

<?xml version="1.0" encoding="UTF-8"?>
<xsl:stylesheet version="1.0"
xmlns:xsl="http://www.w3.org/1999/XSL/Transform"
xmlns:wix="http://schemas.microsoft.com/wix/2006/wi">
  <xsl:output method="xml" indent="yes" />
  <xsl:template match="@*|node()">
    <xsl:copy>
      <xsl:apply-templates select="@*|node()"/>
    </xsl:copy>
  </xsl:template>
  <xsl:key name="service-search" match="wix:Component[contains(wix:File/@Source, '.pdb')]" use="@Id" />
  <xsl:key name="service-search" match="wix:Component[contains(wix:File/@Source, '.xml')]" use="@Id" />
  <xsl:key name="service-search" match="wix:Component[contains(wix:File/@Source, 'app.config')]" use="@Id" />
  <xsl:template match="wix:Component[key('service-search', @Id)]" />
  <xsl:template match="wix:ComponentRef[key('service-search', @Id)]" />
</xsl:stylesheet>

In my main WiX project file, I can now reference all these files using the 'ProductComponents' component group by add a ComponentGroupRef to the Feature section, something like this:

<Feature Id="ProductFeature" Title="LiveViewer" Level="1">
  <ComponentGroupRef Id="ProductComponents" />
</Feature>

Every time I rebuild the setup project the components in the output folder will be re-harvested and added. No need to maintain the list manually. Again, hopefully all of this will become obsolete when the new version of WiX hits.

If you're more comfortable editing XML than messing with the command line, there's also an msbuild target for harvesting a directory; you'd just need to translate the command line options for heat.exe into the correct attributes in the XML wrapper.